Don't you just love those captivating wildlife images set against deep, dark backdrops – they have a certain allure, don't they?
The subjects seem to leap off the screen, every detail accentuated by the enveloping darkness.
This is the magic of low-key photography.
Low-key photography is a fantastic tool to use, especially in contrasty, harsh light. It can turn an otherwise frustrating lighting situation into a perfect opportunity for creating moody, emotion-filled portraits.
But while truly enthralling, it can be a tricky beast to master. It's a fine line between creating an image that's dramatically dark and one that's just, well… dark.
And trust me, I've seen many a seasoned photographer get tangled up in this distinction when they shoot low-key photography.
This guide walks you through the ins and outs of low-key photography so you can skip the confusion, master the exposure techniques, and add this important tool to your kit.

Low-key photography uses minimal light to create drama, mystery, or a heightened focus on the subject of the photograph.
What is low-key photography?
Think of low-key photography as a stage performance. The spotlight is on the performer, while the rest of the stage is cloaked in darkness. It's all about drama, intensity, and focus.
This technique involves crafting images with deep tones and colors, where only the subject—the star of the show—is illuminated correctly while the rest of the frame is immersed in shadows.
While high-key images feel airy, transparent, and light, low-key photos are mysterious and dramatic.
In the context of wildlife and nature photography, low-key photography allows you to create dramatic, intense images that draw attention to only the subject.
This technique is particularly effective in emphasizing the natural textures, colors, interesting shapes, and patterns found in wildlife and nature – the fur of a lion, the flair of feathers on a bird, the scales of a reptile, or the intricate patterns on a leaf.
In essence, low-key lighting photography is about drawing the viewer's eye to the main focus of the picture, making it pop against the darkness rather than letting it blend into a myriad of details.
It's a technique that truly allows your subjects to shine in their own spotlight.

Low key lighting can be accomplished with natural light by using shadows, or with flash by controlling the intensity and direction of the light.
What are the characteristics of low-key photos?
❂ Contrast
Low-key images are characterized by high contrast, which leads to a dramatic effect. The extreme difference between the lightest and darkest elements of the image intensifies the visual impact.
❂ Darkness
Low-key photography uses a lot of dark tones, shadows, and deep black. The majority of the frame is filled with shadows and dark tones, creating a sense of mystery and drawing focus to the illuminated parts of the image. When shooting low-key images, shadows can be very dark but still open, meaning you can see details in all but just the most shaded areas.
❂ Minimal Lighting
This technique focuses on reduced lighting to produce images with striking high contrasts. Low-key photography typically employs only one or two light sources, resulting in a few brightly lit elements against a dark background.
❂ Moodiness
The high contrast and darkness often evoke a moody, dramatic, or even menacing tone, adding an emotional depth to the image.
❂ Intensity of Colors
When color is used in low-key photography, it tends to be rich and intense due to the high contrast, enhancing the visual appeal.
❂ Detail Highlighting
The use of spotlights or focused light sources in low-key photography helps draw attention to specific details or textures, emphasizing the subject's unique characteristics.
❂ Minimalism
Low-key images often have a minimalist aesthetic, as the concentration of light on specific elements simplifies the composition and reduces potential distractions.

Low-key photography can work wonderfully even in harsh lighting conditions. Look for opportunities for low-key photos in the shade of forest canopies and other dark spaces with dappled light.
What are the best lighting conditions for low-key nature photos?
For wildlife and nature photographers, low-key photography is a game changer when faced with harsh or contrasting light.
Instead of struggling with unmanageable shadows or glaring light, the technique allows you to transform problematic lighting into a dramatic, moody scene. It's about harnessing the interplay of light and dark and turning it to your advantage so that your subjects are bathed in optimal light.
The best lighting conditions for low-key photographs are when the subject is brighter – often significantly brighter – than the dark background.

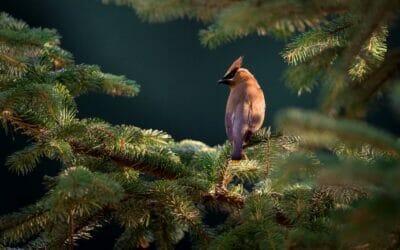
Photo: PK289/Shutterstock
For instance, picture the sun breaking through a forest canopy. The light falls as a beam on a perched bird. There are different light intensities on the bird versus the very dark shadows behind it.
Normally that could seem like a problem. But it's actually the conditions that low-key photography requires.
Think of the beam of sunlight as the key light for the bird. You'll expose for the subject's face and let the shadows fall away into darkness.
Situations like this provide a great opportunity for low-key shots, whether you're working with directional light, such as side lighting, or simply natural light that happens to be high contrast.
Rather than worrying about blown highlights, you're embracing the drama of deep shadow.
Of course, correct exposure still matters! We're looking for a nuanced interplay of light and shadow in low-key photographs, a chiaroscuro effect.
You might want to experiment with different lighting techniques at home, such as Rembrandt lighting or single lighting, to create this elusive atmosphere that you can replicate when you're in the field.

Look for low key opportunities such as wildlife at sunrise or sunset when the light is soft and shadows long.
Camera settings for low-key photography
One of the awesome things about low-key photography is that we have a fair amount of latitude to play around with camera settings. The main thing to remember is to limit the amount of light that enters the camera lens while still focusing on keeping your subject visible.
You'll likely want to always use manual mode since that gives you the most control over the proper exposure. But using shutter speed priority or aperture priority modes along with exposure compensation will work well, too.
We've compiled basic settings but feel free to switch things up if the conditions allow it.
❂ Aperture
Aperture refers to the size of the camera's opening, which allows light to reach the sensor. A larger aperture (represented by a smaller f-number) creates a shallow depth of field, ensuring your subject is sharply in focus while the background remains blurred. This can help craft a low-key photograph since the background falls away in both light and detail.
That said, since this technique is about reducing how much light enters the camera, a smaller aperture (bigger f-number) can be helpful.
Keep in mind that you'll lean heavily on shutter speed to get the exposure just right. So, feel free to find the aperture that gets all of your subject in focus with the correct depth of field while still allowing in enough light.
❂ Shutter Speed
Shutter speed is how long your camera's shutter is open, exposing light to the camera sensor. If your subject is static, a slower shutter speed will allow more light to enter. This can be helpful in very low-light conditions. However, if your subject is moving, you'll need a fast shutter speed to freeze the action.
If you need to get the background darker, use a faster shutter speed.
You can also consider using a single flash or reflector for a little added fill light on the subject while keeping the background on the dark side with a fast shutter speed.

Photo: Strannik_fox/Shutterstock
For landscape scenes like waterfalls, use a slow shutter speed to capture the movement of the water and give it an ethereal effect. You may need to use a neutral density filter to be able to use a slow shutter speed while still blocking out enough light to get the dark, low-key effect in the shadows.
❂ ISO
ISO measures the sensitivity of your camera's sensor to light. Since you want to minimize the amount of ambient light coming into the camera, start with a low ISO.
In low-light settings, you may need to increase the ISO.
However, a higher ISO can lead to more noise or grain in your image. So, it's about finding a balance—enough ISO to get the shot, but not so much that the image quality is compromised.
❂ Exposure Compensation
Lastly, exposure compensation is a tool that allows you to adjust your camera's standard exposure recommendation.
If your image is too dark (underexposed), you can increase the exposure compensation to make it brighter. Conversely, you can decrease it to make the image darker.
Exposure compensation is a helpful way to very quickly change exposure to get that low-key effect as an animal moves from a bright background to a darker one.
🔥 Pro tip: Try using spot metering in your camera settings. This allows your camera to measure light only on your subject rather than the whole frame, helping you achieve the desired contrast between your subject and the background.
Mastering these settings takes time, patience, and a lot of practice. Don't be afraid to experiment with different combinations to find what works best for your subject and lighting conditions.

A lone mushroom stands out against a dark backdrop, highlighting its delicate features and textures. Tip: When post-processing low key nature photos, try increasing the contrast to make darker tones even more dramatic.
Post-processing techniques for low-key photography
Once we've clicked our favorite shots, the next step is to make them pop!
Post-processing plays a significant role in low-key photography, especially for nature and wildlife photographers, where things like leaves, rocks, or other background elements may be distracting and need a little extra finessing.
This phase allows you to tweak the image to achieve that perfect balance of light and dark, creating a dramatic and powerful visual impact.
1. Use of Raw Format
Capture your images in RAW format. This format captures all the data from the sensor, providing you with a wider dynamic range to work on in the post-production phase.
2. Basic Adjustments
Start with basic adjustments like exposure, contrast, highlights, and shadows. Lowering any overly-bright highlights and darkening the shadows can further enhance the low-key effect. Be careful not to overdo it and lose detail – sometimes a little texture in that dark background really adds to the visual impact.
3. Dodge and Burn
“Dodge and Burn” is a technique where you lighten (dodge) or darken (burn) specific areas of the photo. Use this to direct the viewer's eye to the subject by lightening it and creating a deeper contrast by darkening the surrounding areas.
Selectively adjusting the exposure and contrast of certain parts of the image helps maximize that low-key effect. You can do this easily with brush tools in Lightroom or Photoshop.
4. Noise Reduction
A higher ISO might introduce noise. So, to improve the quality and clarity of a low-key portrait, try reducing the noise. Use noise reduction in Lightroom, or a smart sharpening filter in Photoshop, which helps enhance the edges and details of the image. Another great noise reduction software is Topaz AI.
5. Correcting the white balance
To ensure the tone and overall color scheme of the photo remain consistent, correct the white balance, and be mindful of the temperature and saturation as well.
6. Sharpening
Finally, sharpening your subject can make it stand out against the dark background. However, avoid over-sharpening, which can lead to an unnatural look.
Remember, post-production is a personal and creative process. Don't hesitate to experiment with different techniques to achieve the desired effect.

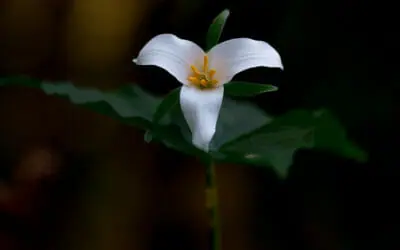
Photo: Thomas Retterath/Shutterstock
Using techniques for low-key photos can help isolate a subject in the environment, adding more focus to the subject while minimizing clutter.
Tips for great low-key nature photos
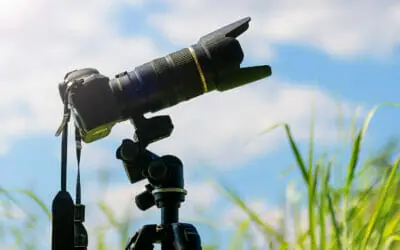
Having an understanding of baseline camera settings and the right equipment is important when starting with low-key photography.
However, the most practical knowledge you will acquire comes through regular practice.
Here's a list of tips that can be your starting point for experimenting and playing around with this technique.
1. Moonlight for Night Photography
Use the moon's natural light to your advantage when shooting low-key photos at night. Moonlight can provide enough illumination to emphasize your subject yet maintain the overall darkness required for a low-key effect.
2. Utilize Weather Conditions
Overcast or foggy conditions can help create a natural low-key effect. The diffused light in these conditions can help subdue the overall brightness level and help your subject stand out against moody backgrounds.
3. Experiment with Black and White
Black and white can be a powerful medium for low-key photography. The absence of color places a greater emphasis on the difference between light and dark areas, making your subject more striking.
4. Use Natural Structures
Make use of natural structures like trees, hills, or boulders to shield the background from light. This can help create interesting textures in the background of the image and add depth to your low-key photos.

When taking photos of subjects in dark environments, try increasing exposure to keep the subject bright and colorful.
5. Keep the subject bright
When you shoot low-key images, the subject should be the only part that's brightly lit. So think “illumination and elimination” to get the most out of your low-key photo.
Think about where the light is falling, and watch for areas of the background where you don't want the light to fall.
If you keep your subject more forward in the frame, it's easier to maintain a bright subject with a darker background.
6. Experiment
Low-key photography is all about capturing varying degrees of darkness and shadows, which leaves ample room for creativity.
Despite the emphasis on darkness, it's your application and control of light that makes your photos stand out.
Each lighting decision you make is reflected in your image, so take the time to fine-tune your approach until you're satisfied with the result.
Shooting low-key photography can be an exciting journey into the realm of shadows, letting you weave stories of drama and mystery with your lens.
It can also save you from frustration when faced with amazing animal behavior but contrasty lighting conditions.
This fantastic technique is not about completely eliminating light but rather manipulating it to create a low-key show where your subject shines out from the darkness.
The light source you choose, whether it's the soft glow of the moon or bright beams of sunlight, can dramatically alter the mood of your low-key portraits, and it's always fun to play with the possibilities!
Now head out there and experiment, practice, and bring your own unique vision to life through low-key photography!


")