Contents
Read Time: 9 minutes
Getting close-up images of flowers can feel like exploring a secret universe that's always been there but just out of sight.
But it's not as simple as getting your lens super close to the main flower and clicking away.
It's about understanding how to draw attention to the subject, exploring different viewpoints, and immersing yourself in the beauty of this flower-filled scene.
In this article, we'll cover the techniques of macro photography that help you capture flowers at their best.
From framing and focus to lighting and composition, learn practical tips and strategies to help you make extraordinary photos of your favorite blooms.
Contents
- Best lens to use
- Extension tubes
- Best camera settings
- Use a tripod for stability
- Use manual focus for sharp shots
- Have fun with creative compositions
- Play with using flash or a reflector
- Explore backlighting
- Add dew drops
- Play with perspective
- Explore different flower species
- Experiment with black-and-white photography
- Use your photos to help with conservation

Photo: bogdandimages/Shutterstock
Best lenses to use
Since “close up” is the focus here, you might assume you need a macro lens to capture this type of photography. But, that isn't always the case.
While a macro lens is certainly a great option, there isn't one particular lens you're required to use. Indeed, you can use wide-angle lens with an extension tube, which allows you to get closer to your subject. You can even use a telephoto lens and zoom in.
Let's look at different lens options:
❂ Macro Lens
A Macro Lens is a specialized photography lens designed to capture small subjects at close distances. It's commonly used for close-up, intricate, and detailed photography.
The beauty of a macro lens lies in its ability to reproduce a life-size 1:1 magnification of the subject onto the camera sensor.
With this lens, you can capture breathtakingly detailed images of the intricate textures and colors of flowers that are often invisible to the naked eye.
Pros
Details: A macro lens provides superb detail; it can render minute elements of the flower that are typically invisible to the naked eye.
Working Distance: Macro lenses offer a comfortable working distance. This means you can still create a close-up shot without being too near the flower, minimizing the risk of casting shadows on your subject.
Versatility: Despite their name, macro lenses are not solely for close-up shots. They are also effective for general photography, including portraits and landscapes.
Cons
Cost: Macro lenses are typically more expensive than their standard counterparts. This higher cost may feel like a barrier to using one.
Learning Curve: Given their ability to pick up intricate details, macro lenses can be more challenging to use effectively. It requires understanding and adjusting depth of field, managing camera shake, and mastering precise focusing.
❂ Close-Up Lens
A close-up lens is a more cost-effective alternative to a macro lens. They are essentially magnifying glasses that you can attach to the front of your existing lens to allow it to focus at closer distances, thus providing increased magnification.
They are available in varying strengths, often labeled as +1, +2, +4, etc., with higher numbers providing greater magnification.
When it comes to flower photography, a close-up lens can be an effective tool in your gear.
Here's how to use it:
Attachment: Screw the lens onto the front of your camera lens like a filter. You can also stack different close-up lenses together for higher magnification, but be aware that this may impact image quality.
Manual Focus: Although some lenses will still allow autofocus, manual focus gives you more control and precision. This is especially important for close-up photography where even the slightest shift can change what's in focus.
Stabilization: Using a tripod, monopod, or other stabilizing device, as even slight camera shake can blur your detailed close-ups.
Depth of Field: With a close-up lens, the depth of field will be very shallow. To ensure your flower is adequately in focus, you may need to use a smaller aperture (larger f-number).
Composition: Experiment with angles and perspectives. Shoot from the side to capture patterns in the petals or shoot from underneath to capture the color contrast against the sky.
Lighting: Soft and diffused light, such as in the early morning or late evening, can bring out the best in your flower shots. Direct sunlight in the middle of the day may create harsh shadows.
A close-up lens doesn't replace a macro lens, but it's a worthy addition to your photography kit when starting out in close-up flower photography or if you're working on a budget.
Additionally, the lenses you have on hand might be perfectly suitable for your flower adventure.
Both wide-angle prime lens or a zoom telephoto lens offer unique perspectives and advantages in flower photography, too.
So your lens choice ultimately comes down to just a few factors:
1. Maximum Magnification: This is a measure of how large a subject can appear in your image. Lenses with higher magnification can show more detail in a flower's intricate structures.
2. Minimum Focusing Distance: This is the closest distance at which a lens can focus. A shorter minimum focus distance means you can get closer to the flower, which could be helpful in tight spaces.
3. Image Quality: A lens's sharpness, color rendition, and contrast greatly affect the final image quality. Some lenses may also feature special coatings to reduce lens flare and ghosting.
4. Price: Your budget is obviously a significant factor when choosing a lens. Fortunately, there are lenses for close-up photography available in a wide range of prices, so you should be able to find one that suits your needs and budget.
While you're dipping your toes into this creative niche, use what lens you already have and instead zero in on the technical skills that help you create extraordinary flower shots.

Photo: Antonio S/Shutterstock
Extension Tubes
If you want an affordable and effective method for capturing stunning close-up flower photos, extension tubes might be your answer.
Extension tubes, essentially hollow cylinders without any optical elements, are designed to increase the distance between your camera's sensor and the lens. This increased gap allows your lens to focus more closely, thus magnifying the subject in your frame.
When using extension tubes, your standard lens can suddenly take on the characteristics of a macro lens, enabling you to capture the intricate details of flowers without investing in a specialized lens.
Extension tubes come in various lengths, typically ranging from 12mm to 36mm. The longer the tube, the closer you can get to your subject. Consider starting with a medium-length tube and experimenting from there.
Now that you have an idea of all the lens options at your fingertips, let's move on to camera settings!

Photo: DreamLand Media/Shutterstock
Best camera settings
When shooting close-up flower photos, it's crucial to understand and manipulate your camera settings to achieve the best outcome.
Aperture
For most close-up flower photography, you will want to ensure the whole flower is in focus. An aperture setting around f/8 to f/16 usually provides a sufficient depth of field while maintaining sharpness.
However, if you want only part of your flower in focus for a creative effect, you can use a larger aperture (smaller f-number).
Shutter Speed
A fast shutter speed is often unnecessary for stationary subjects like flowers. But if you're dealing with wind or other movement, you might need a faster shutter speed to capture a sharp image. Anything above 1/200 should work in most cases.
ISO
Keep your ISO as low as possible to reduce noise. An ISO of 100 or 200 is often suitable for outdoor shooting. Of course, if you're shooting in low-light conditions, you may need to increase your ISO.
These are just starting points.
The best settings for close-up flower photos will always depend on the lighting conditions, the flower you photograph, and the creative effect you aim for. So don't be afraid to experiment!
Now, let's move on to our 10 tips for nailing gorgeous close-up flower photos!

Photo: Jaymi Heimbuch
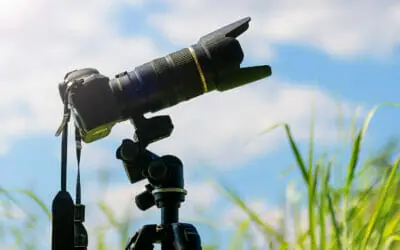
1. Use a tripod for stability
This piece of camera gear is an absolute must. It will make everything about your photo shoot that much more pleasant and will make a significant difference in the quality of your images, particularly when working with a shallow depth of field.
A full-frame camera paired with a wide aperture can generate a beautiful, soft background, isolating your floral subject and highlighting its intricate details. However, this technique also narrows the focus plane, making it easy to miss focus or get blurred, shaky shots.
Hence, a tripod becomes an essential tool. It eliminates the risk of camera shake, allowing you to precisely manage the depth of field and get sharp, clear images regardless of your aperture settings.

Photo: MMXeon/Shutterstock
2. Use manual focus for sharp shots
In close-up flower photography, achieving sharp, well-defined images is vital. One pivotal technique to accomplish this is through the use of manual focus.
Auto-focus may be convenient in many contexts, but it can struggle with the fine details and compositions common in close-up photography.
On the other hand, manual focus gives you the control to pinpoint exactly where you want the sharpest focus to be.
By using manual focus, you're ensuring that the most critical parts of your flower – be it the intricate stamen, delicate petal edges or captivating color patterns – are in crystal clear focus.
This method requires a bit of practice to master, but the resulting clarity and depth are well worth the effort.

Photo: BilgeP/Shutterstock
3. Have fun with creative compositions
Creative composition is the heart of every compelling flower photo. It allows you to transform the ordinary into a work of art.
Explore a different focal point in every shot — it could be a unique petal, the flower's core, or an intriguing color pattern. Have fun with surprising crops or using lots of negative space in your frame.
Play with lighting and shadows to add depth and drama to your compositions.
And finally, consider the flower's environment in your composition. Leaves, stems, and even the background can add extra details, enhancing the overall image.
The key to creative compositions is experimentation. So, don't be afraid to try new things and step outside of your comfort zone.

Photo: Jaymi Heimbuch
4. Play with using flash or a reflector
When using a flash, consider diffusing it to avoid overexposing your shot. A soft flash can bring out the vibrant colors of the flower without making it look washed out.
On the other hand, a reflector is an excellent tool for controlling natural light on sunny days. Position it to bounce sunlight onto your subject, creating a well-lit and balanced image.
A silver reflector works best to bounce light onto the flower. However, if the images lack warmth, a gold reflector will provide it.
🔥 Pro tip: If the wind is picking up and ruining your shots, use a reflector to block the breeze. It'll help keep your flower more still for those tack-sharp shots.

Photo: Jaymi Heimbuch
5. Explore backlighting
Backlighting is a powerful technique that can give your close-up flower photos a unique, ethereal quality.
Position your flower between the camera and the light source—typically the sun, but you can also use an L.E.D. light or a flash—so the light shines through the petals, accentuating their vibrancy and translucence. This is a wonderful technique to focus on shape, or interesting vein patterns, in your composition.
It's extra fun to experiment with this technique during the golden hours—shortly after sunrise or before sunset—when the light is softer and warmer.
Be prepared to adjust your camera settings, particularly the exposure, to prevent overexposing the sky or background.
🔥 Pro Tip: Using your camera's spot metering mode on the flower can help you get proper exposure.

Photo: John A. Anderson/Shutterstock
6. Add dew drops
There's something magical about dew-kissed flowers that simply captivates the viewer. Adding dew drops to your flower photography can significantly enhance the overall aesthetic and offer a fresh perspective.
You can either choose to shoot early in the morning when dew naturally forms or create your own with a simple spray bottle filled with water.
When photographing, aim to capture the way the drops magnify the intricate details of the flower and how they refract light, adding a beautiful sparkle.
But remember, less is often more when it comes to dew drops, so avoid over-spraying.

Photo: Marlinde/Shutterstock
7. Play with perspective
Playing with perspective in flower photography can lead to some truly stunning and unique images. Rather than always having a straight-on view, consider tilting your camera for an angled shot. Or get low and shoot upwards to make the flower appear towering and majestic.
If you're photographing a field of flowers, you can also play with depth of field and focus on a single flower while blurring the rest, creating a sense of depth and space.
Alternatively, you could use a wide-angle lens and get close to the flower, which would make it appear larger than life against a dramatically receding background.
A 15mm diagonal fisheye is a fantastic lens choice for this creative composition idea. (I personally love using this Sigma 15mm f/2.8 lens for fun wide-angle macro work.)

Photo: AlessandroZocc/Shutterstock
8. Explore different flower species
The world of flowers is incredibly diverse, each with unique shapes, colors, and textures. Exploring different species can add variety and interest to your portfolio.
Some flowers may have intricate stamens, others have intriguing petal patterns, and others offer striking color combinations.
The more you expand your floral subjects, the more opportunity you have to create visually exciting images.

Photo: YIUCHEUNG/Shutterstock
9. Experiment with black-and-white photography
Turning your close-up flower photos into black and white can result in some exceptionally dramatic images.
This style emphasizes the structure and form of the flower, allowing textures and shapes to take center stage.
The absence of color encourages viewers to appreciate the flower's natural beauty in a different and often striking light.

Photo: Jaymi Heimbuch
10. Use your photos to help with conservation
Using your flower photography for conservation efforts can make a significant impact by raising awareness about the importance of preserving biodiversity.
Your images can showcase the beauty and diversity of local flora, drawing attention to lesser-known species and highlighting the importance of their habitats.
By sharing these photos on social platforms, in galleries, or in collaboration with conservation organizations, you can help educate the public about the need to protect these natural treasures for future generations.
Photography can be a powerful tool for conservation, transforming the viewer's perspective and inspiring action towards protecting our environment. So, your beautiful flower photos have power to help the planet in ways that truly matter.
So, get out there, explore, experiment, and let your flower photos bloom!
Recommended: Check out our complete guide to conservation photography and how you can get started.


")