Read Time: 8 minutes
How often have you paused to watch a beautiful rainbow in the sky? It's awe-inspiring. (And if luck is on your side, you might even witness double rainbows!)
No matter how often you see them, something about those colors in the sky will always stop you in your tracks.
This spectacular phenomenon, and its relatively rare or brief occurrence, make them truly fascinating. So when we see one, naturally, we want to grab a camera and head out to work on our rainbow photography.
Because rainbows can be so short-lived, you have to work fast. As the beautiful arc appears and disappears in mere moments, you have just a brief window of time to capture its beauty.
So, we have the best tricks to increase your chances of capturing this natural phenomenon!

Photo: Smit/Shutterstock
There's nothing quite like heading out after a storm and seeing rainbows appear in a mix of cloud and sunlight.
Best weather conditions for finding rainbows to photograph
If you're looking to photograph rainbows, you need three things: a storm's aftermath (or a misty water source like a waterfall), the right time of day, and a good location.
Here's why.
The phenomenon becomes visible only when there's an abundance of moisture in the air, along with bright light from the sun coming at just the right angle. But it's tricky to get this balance just right for a rainbow.
Rainbows appear when light hits moisture, creating a spectrum of colors. That's why after a storm – when there's both rain and sunlight in the atmosphere – is your best bet to catch this phenomenon. But don't rush out immediately; timing is crucial.
Aim for early morning or late afternoon when the sun is at a 42-degree angle with the horizon. This is when the light conditions are just right to create a rainbow.
So, when you notice stormy clouds with water droplets on one side of the landscape and a bit of clear sky and bright sunlight on the other, this will be your cue. Analyze the sun's position and try to get into a 42-degree angle to see the rainbow.
Your location matters too. A wide-open space, preferably near water, increases the chances of a rainbow appearing. The sky acts as a canvas, and the reflective surface enhances the visibility and vibrancy of the rainbow.
Of course, this can be challenging. Clouds may cover the sun, or the rain might stop too soon. But don't let those hurdles discourage you. See them as opportunities to learn and adapt.
Keep your camera ready and your spirit high. With patience and persistence, you'll be rewarded with a stunning rainbow shot.

Photo: Lukas Jonaitis/Shutterstock
Even partial rainbows are a great subject. Consider the rule of thirds when composing a partial rainbow to give it the most zing in the frame.
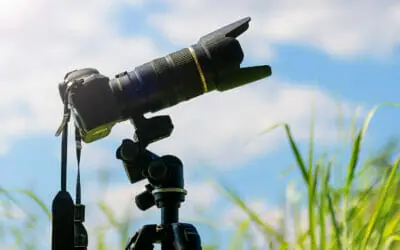
Camera equipment for photographing rainbows
If you see a rainbow, capturing it needs to happen almost instantly since it doesn't last for too long. Make sure you are well-equipped to capture the best photos.
Here's what you need to create rainbows photos:
Tripod
It's always best to use a tripod for all landscape shots, but rainbow shots are particularly important. That's because you're shooting in rapidly changing light conditions.
It gives you more flexibility to play with slower shutter speeds while avoiding camera shake for a sharp photo.
In addition, they keep the camera secure and stable, resulting in clear and sharp pictures with every shot you make.
Lenses
We always encourage you to use whatever camera equipment to have on hand. But as a rule of thumb, higher-quality lenses provide more vivid results. So if you want your rainbows to truly pop out in a tack-sharp scene, consider investing in a quality lens.
Wide-angle lenses are useful for capturing the full extent of the rainbow and its surroundings. It allows for more landscape to fit in a single frame, making the image even more striking.
Alternatively, if you use telephoto lenses, you can capture a more detailed look of the rainbow. Its long focal length brings the rainbow ‘closer' to you, providing an in-depth look at its color and arc.
Rain Protector
A rain cover is an important piece of equipment, protecting the camera and lens from rain and moisture. It is especially important when shooting rainbows during humid or rainy conditions. A rain protector can help you continue shooting without worrying about damage to your gear, so don't go anywhere without it if the sky is looking heavy!
Polarizing Filter
Want to make a rainbow stand out? A polarizing filter can block reflected light and reduce the light source reaching the camera sensor. The result can be more intense colors and increased contrast, making the rainbow's colors pop against the sky.

Photo: Mike Liu/Shutterstock
You don't always need rainy weather for rainbows. Waterfalls are a wonderful source too, like this view of a rainbow over Waimea Canyon in Kauai, Hawaii.
Camera Settings for rainbow photography
Here are the essential camera settings you need to adjust in manual mode for a perfect rainbow photography session.
Aperture
Because rainbows are usually part of a larger landscape photo, you'll typically use narrow apertures to get a good depth of field with adequate sharpness throughout the entire image.
An f-stop such as f/11 or f/16 usually works wonderfully for capturing rainbows.
Keep in mind that every setting on your camera should serve the purpose of enhancing the vibrancy and clarity of the rainbow against its backdrop. The aperture setting is no exception.
So, start with an aperture like f/11 but feel free to play with different apertures to get the best depth of field and exposure balance when factoring in the other settings.
ISO
When it comes to capturing rainbows, maintaining a low ISO setting is essential as this gives you the least amount of noise in the scene.
Start with an ISO value of 100 or 200, and adjust this setting based on the available light. If you're shooting in lower light conditions after a storm, you may need to increase the ISO number.
Just remember, increasing the ISO can lead to grainier images, so it's a balancing act to capture the best shot.
Shutter Speed
Naturally, the shutter speed changes the look of your photos significantly. This is especially true if you're working in dramatic light conditions such as what we normally see with rainbow-making weather.
Shutter speed will also be your most variable setting – the one you'll change up the most.
Start by setting your camera's lowest ISO setting and the ideal aperture (f/11 or f/16). Then select a shutter speed that creates a balanced exposure.
If this is a slow shutter speed, ensure you're using a tripod to prevent camera shake.
Depending on the brightness of the rest of the scene, you may need to play with shutter speed to get the balance just right.
Also, considering rainbows appear when clouds are moving across the sky, causing light to shift, you'll likely need to adjust shutter speed often to maintain a good exposure balance.
Exposure Balance
Exposure is essential in all forms of photography, and rainbow photography is no exception.
Keep the shot slightly underexposed to give it a deeper saturation. Anything overexposed will wash out the shot and make the rainbow less dramatic.
That said, you'll still want to carefully watch your exposure and keep it relatively balanced so there is no clipping in the shadows or highlights of the scene.
If you are using a polarizer, there may be a loss of about 1.5 stops of light. This means you'll likely use a slower shutter speed to balance the exposure and get a brighter exposure.
A slower shutter speed is also helpful if you're shooting toward dark clouds. You may even be able to capture some of the movement of the clouds for some extra drama in the scene.

Photo: Kim_Briers/Shutterstock
Rainbows can be small in the scene and still add incredible oomph, like this view from Yosemite National Park. Use leading lines and elements in the environment to point viewers' eyes to the colorful arch.
5 Composition tips for rainbows photography
Composition plays the biggest role in creating an awesome photo. Moreso even than getting the perfect exposure. Just taking a simple photo of the rainbow smack in the middle of the frame, as if it's just an interesting foreground element, could be a boring snapshot. So take into account compositional elements that make the rainbow a main character within a balanced scene.
Here are composition tips that'll help a snapshot turn into a masterpiece:
1. Complete the Rainbow
When framing a landscape photo, aim to capture the complete arc of the rainbow as it creates a natural, compelling curve that draws the viewer's eye across the scene, adding depth and dynamism to your shot.
If it is a partial rainbow, you can try and position yourself in such a manner so the visible endpoint lands over some interesting subject. It can be tricky finding the perfect shot, but it will always be worth it.
2. Reflections
Capturing reflections of a rainbow (or a double rainbow) is even rarer than the phenomenon, but if you are fortunate enough, you just might have the perfect opportunity to create a striking shot. It is not easy to capture, but when it comes off, it can be dramatic.
For reflections, a wide-angle lens is essential, as it allows you to get both elements of the rainbow in a single frame.

Photo: Phillip B. Espinasse/Shutterstock
Reflections are a fantastic way to make double rainbows happen! Look for pools of still water to get a two-fer shot.
3. Leading Lines
Leading lines are a powerful tool for enhancing your rainbow photography. They guide the viewer's eye through the image and can be used to direct attention toward the rainbow.
Roads, fences, streams, or even the edge of a field can work well. For instance, a winding road leading toward a rainbow can add a sense of depth and perspective to your shot, emphasizing the scale and natural beauty of the rainbow.
Consider the positioning of these lines, as they can either lead toward the base of the rainbow or align with the curvature of the rainbow itself.
4. Watch the horizon
When composing your shot with the rainbow and landscape, it's essential to carefully consider the positioning of the horizon line.
Avoid placing the horizon smack in the middle of the shot. This common mistake can lead to a static and less engaging image.
Instead, apply the rule of thirds.
If the sky and rainbow are the key points of interest, place the horizon along the bottom third of the frame. Conversely, if the landscape is more compelling, position the horizon along the top third.

Photo: TTstudio/Shutterstock
Foreground elements are just as important as the distant rainbow. Always watch for leading lines or elements that add interest to the scene.
5. Watch for distracting elements
Be mindful of clutter in your landscape photo of a rainbow, as extraneous elements can distract from the rainbow's natural beauty.
Pay attention to the background behind the rainbow. Sometimes particularly bright or dark elements behind the rainbow can be distracting or break the arc of the rainbow.
Strive to keep the composition as clean and simple as possible to let the rainbow take center stage.

Photo: Andrey Bocharov/Shutterstock
Pay close attention to what's under the rainbow. Distracting things like extra bright or dark items can draw eyes away from the rainbow.
Post-processing tips for rainbow photography
When it comes to post-processing your rainbow photographs, subtle enhancements can have a profound impact.
Start by adjusting the contrast to make the colors of the rainbow pop and the overall image more vibrant.
Use the saturation slider sparingly to enhance the natural colors without making the image appear unrealistic. It's easy for the blue of the sky to become oversaturated, so watch for this and use a subtle hand when it comes to vibrance and saturation.
Pay attention to the balance between highlights and shadows – you don't want to lose detail by over-brightening or over-darkening areas.
You may want to use the dodge and burn tool to selectively brighten the rainbow and darken the surrounding sky for added emphasis.
The goal of post-processing should be to enhance the natural beauty of the moment, not to create something that wasn't there. Be mindful of retaining the authenticity of the scene.

Photo: Martin Mecnarowski/Shutterstock
Though fleeting, rainbows are an extra special and fun natural phenomenon to photograph, and provide you with tons of practice for balanced exposure, savvy composition, and subtle but powerful post-processing strategies.
Snapping a picture of a rainbow isn't just about the click of a button. It's like trying to solve a puzzle with pieces made up of light, perspective, and atmospheric conditions.
The journey of getting that perfect shot — from framing the complete arc to finding the ideal ISO and exposure balance — is bound to leave you both challenged and inspired.
Ultimately, the goal is to present the rainbow as the main character within a balanced composition, allowing its beauty to take center stage.
So the next time you see a rainbow, we hope you'll be inspired to grab your camera (and tripod!) and head outside to capture the moment in all its grandeur.


")