Feature photo by Jaymi Heimbuch
Read Time: 14 minutes
Through your camera lens, the world above comes alive in a way we can't see with the human eye, allowing you to take captivating photos showing off the stunning patterns, colors, and movement of light and darkness in a single frame.
In this article, we provide you with a step-by-step guide to help you capture breathtaking images of the Milky Way, star trails, and more to share with the rest of the world once they wake.
Contents
- What is night sky photography?
- What to pack
- 6 best apps and websites for planning your night sky photography outing
- How to prepare for a night sky photo shoot
- What camera settings to use
- 7 tips & techniques for better shots
- How to find night sky photography locations
- Dark sky conservation and how you can help
What is night sky photography?
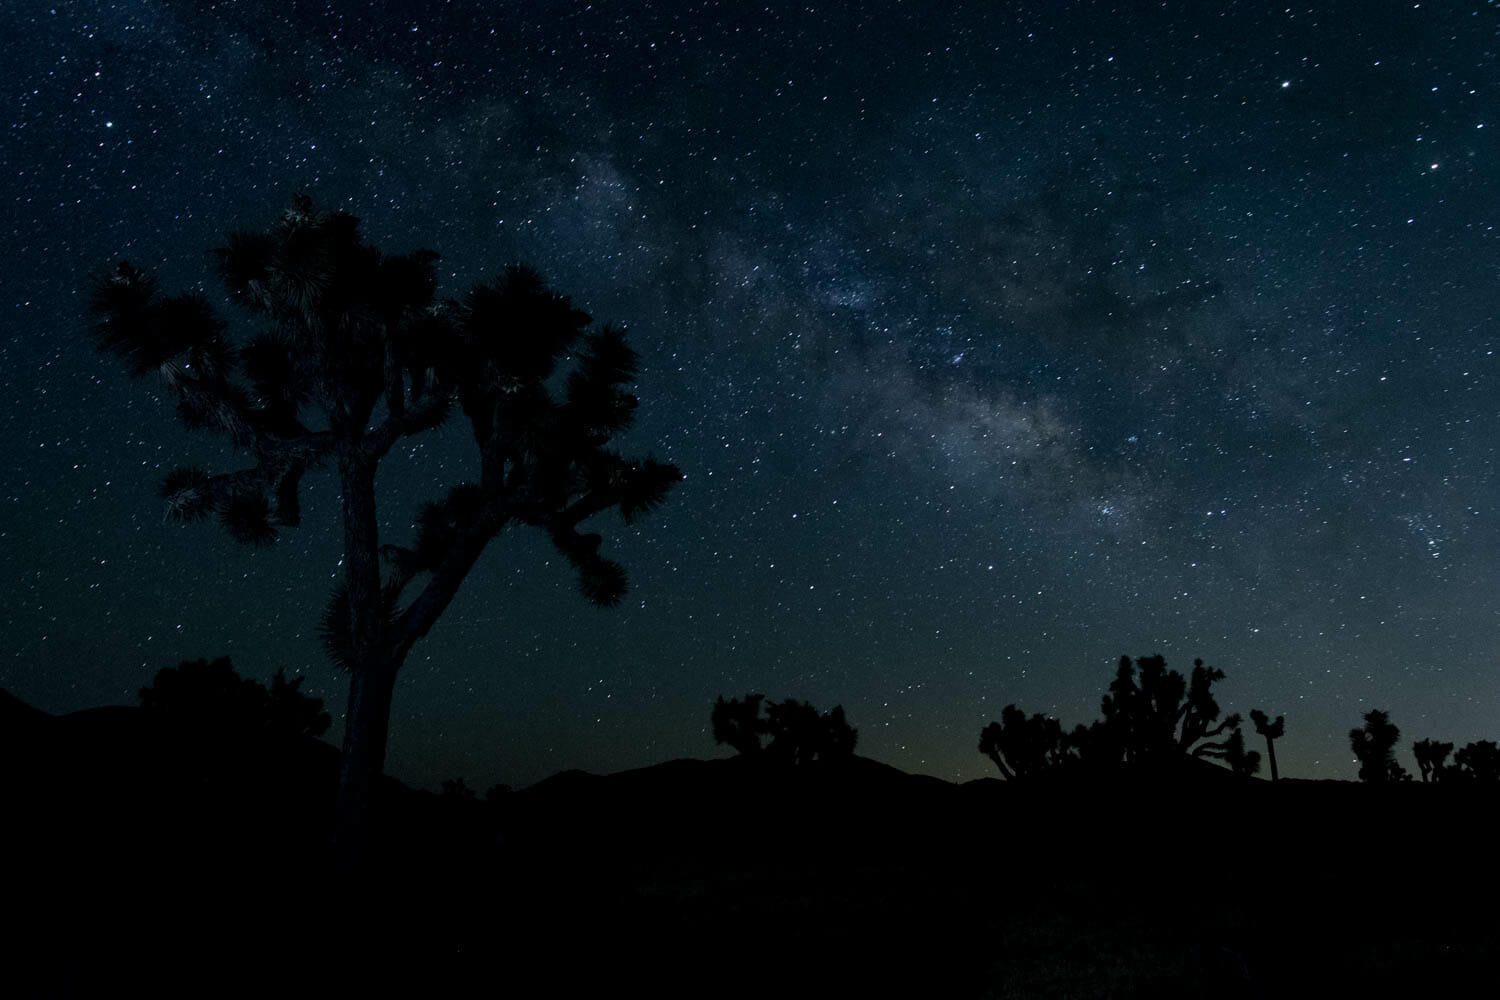
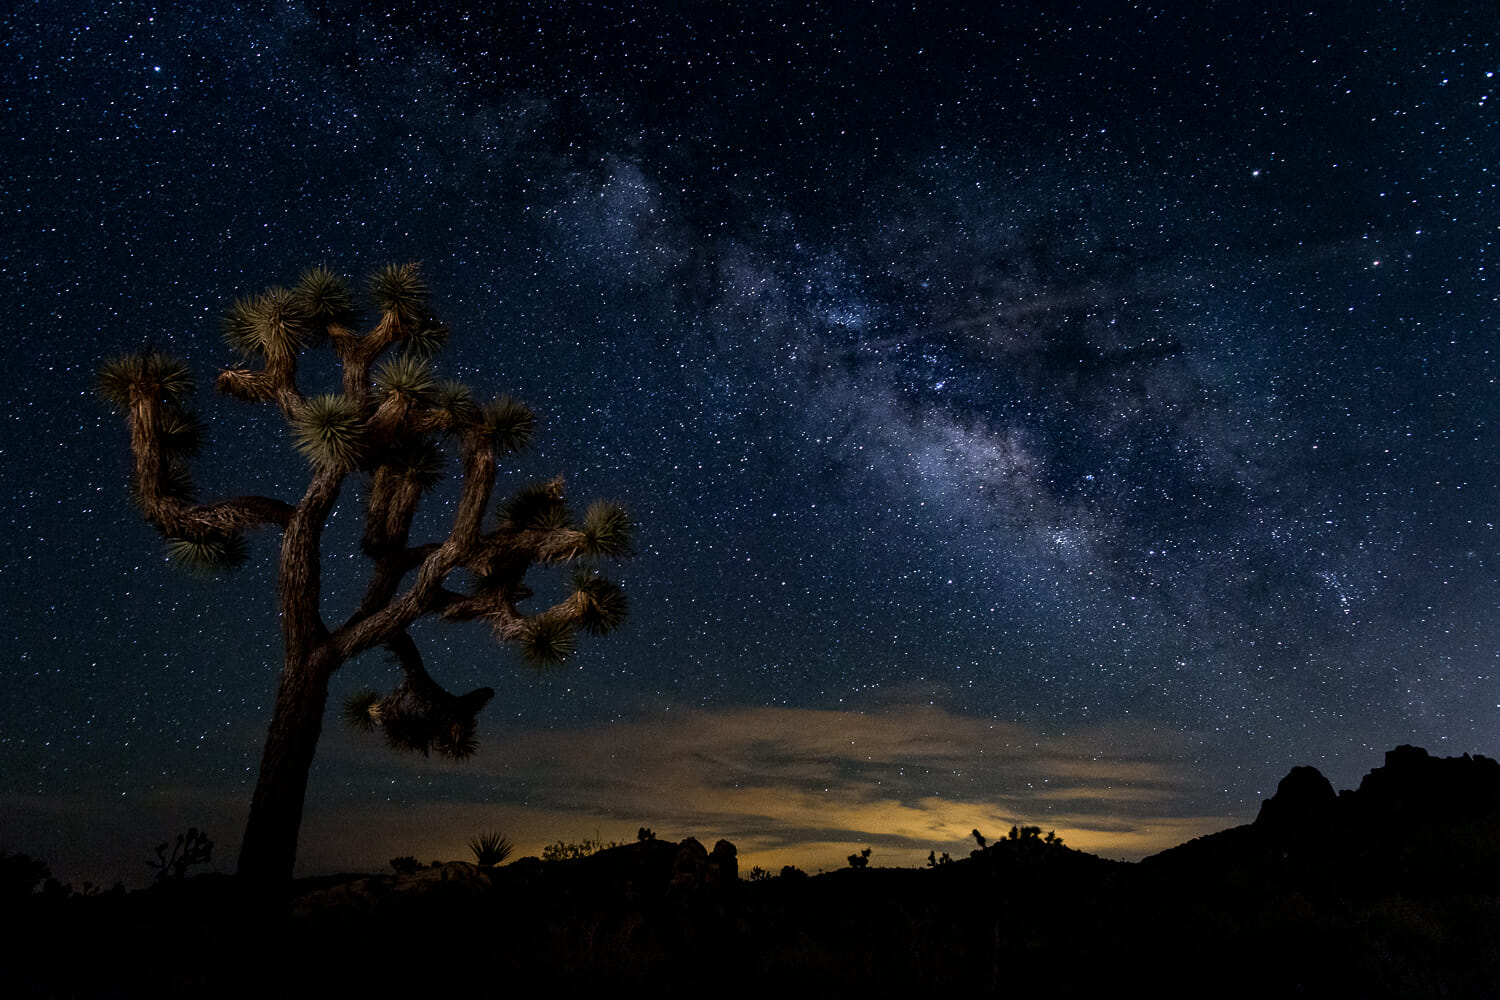
The night sky is a magical, infinite, awe-inspiring sight, not quite able to be captured in words, but possible with a photograph. In fact, night sky photography helps us see the beautiful expanse in a way we never could with our naked eyes.
From the jaw-dropping complexity of the Milky Way to the magic of the northern lights, the night sky provides as much inspiration for photographers as any daytime scene.
With the right combination of equipment and techniques, you can bring the breathtaking view of the night sky's ever-changing mosaic of light down to earth.

Photo: Kosoff/Shutterstock
The great thing about night sky photography is it doesn't take a bunch of specialized equipment. You can get started with minimal gear now, and get fancy later as your creativity grows!
What to pack
Here are the essentials you'll need to begin your journey:
Camera
With their high ISO capabilities, DSLR cameras allow you to capture the light and detail of the night sky perfectly. They also feature long battery life and good weather sealing, making them great for shooting in challenging conditions.
Lens
A wide-angle lens is generally best for capturing more of the night sky in a single frame and reducing star trails, with a focal length of anything from 16-35mm working well. But depending on your creative idea for the shot, you may want to experiment with different lenses and focal lengths.
For example, if you're shooting stars or constellations up close, a telephoto lens (such as a 70-200mm range) could be better suited than a wide-angle lens. On the other hand, if you're trying to capture an expansive landscape along with stars, a focal length of 16mm is often preferable.
In addition, we recommend a fast wide-angle lens. For night sky photography, you want to use an f/2 or wider aperture so as much light as possible enters your lens and captures all the stars in the night sky with sharp detail. So when choosing a lens, think wide and fast!
Tip: Remember to pack your camera lens hood. It might surprise you, but this little tool is helpful for keeping lens flare from headlamps and other sources out of your shots.
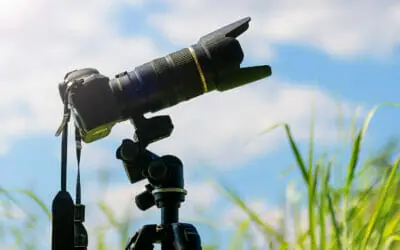
Tripod
Bring a sturdy tripod with adjustable legs, easy setup, and sturdy construction that is rated to support the weight of your camera and lens combination.

Photo: pattara puttiwong/Shutterstock
A simple remote shutter release goes a long way to minimize camera shake so you can make sharp images. A wireless trigger is best to use whenever possible. But if you need to use a shutter release with a cord, here's a great trick: Set your camera to use a 5 second delay, trigger the shutter, and set the trigger down. That way, there's time for any accidental movement caused by wiggling the cord to stop well before the camera even begins to make the image.
Remote camera shutter releases or intervalometers
These tools allow you to control the camera remotely, so you can set it up with your desired exposure time and leave it alone while capturing multiple shots. They also help eliminate shake in long-exposure images due to pressing the shutter manually.
Intervalometers are particularly useful as they allow you to set up timed intervals between shots, enabling longer exposures and more creative shooting.
Either a remote shutter release or intervalometer is an inexpensive way to significantly improve the quality of your star photos. Typically you can pick one up for as little as $40-$60.
Headlamp
Headlamps free up your hands while providing enough light so you can set up your base and locate equipment with relative ease. Look for one with adjustable brightness levels, a red light mode (to not interfere with long exposures), and an adjustable beam angle (to direct light where you need it without affecting the area of your shot.)
Warm clothes
Layer lightweight, breathable clothing (including a jacket, gloves, and hat) to keep you warm while allowing movement. Stay safe by wearing non-slip shoes to provide grip on uneven terrain. Also, remember that reflective surfaces on your clothing or shoes may affect your photos.
Extra batteries and memory cards
And, of course, extras of the things that keep you powered up! Cameras tend to burn through batteries when taking long exposures, and you don't want to cut your outing short by running out of juice or memory.
A note on renting versus buying a camera and equipment:
Rental offers the flexibility in choosing the best camera and equipment for a specific shoot without committing to an expensive purchase upfront.
At the same time, you may be limited in terms of how long you can rent the camera or equipment or be subject to mileage limits on certain items like lenses.
In buying a camera and camera equipment, you own it for life, giving you ultimate control over usage and customization.

Photo: anatoliy_gleb/Shutterstock
Have fun with self-portraits or using models for your photos. It's a fun way to explore both composition and ideal settings for different scenarios. Sky's the limit on creativity!
6 best apps & websites for planning your night sky photography outing
1. PhotoPills
PhotoPills is a powerful app and website designed to help folks like night sky photographers strategically plan their outings. With PhotoPills, you can easily determine the best time and location for shooting stars, galaxies, meteors, planets, and other celestial bodies against the backdrop of the night sky. It also provides detailed information on moon phases, sunrises/sunsets, and astronomical events like eclipses. The app's interactive map allows you to pinpoint exact locations with just a few taps or clicks so that you can get out there and start capturing those beautiful shots!
2. Weather Underground
Weather Underground is your go-to app (or website!) for detailed weather forecasts and analysis. It's an invaluable tool for photographers who want to plan their night sky photography outings, as it offers accurate predictions of the conditions they can expect on the day of their shoot. With features such as hourly forecasts, radar maps, and historical records, Weather Underground helps you make informed decisions about when to go out shooting and what equipment to bring.
3. Light Pollution Map
Light Pollution Map is an essential tool for night sky photography. It provides a comprehensive map of light pollution levels worldwide, allowing users to easily identify dark sky regions and plan their photography outings accordingly. The detailed maps and interactive features help you scout out the best locations for capturing stunning photos of stars, galaxies, and other celestial phenomena. If you're worried about the impact of light-polluted areas on your images – such as the orange glow at the horizon line from urban street lights – this tool is your solution.
⇢ Website
4. Time and Date
Time and Date's Moon page offers comprehensive information about the moon's phase, age, location in the sky, and more – all of which are essential for planning a successful night sky photography outing. How much light is coming from the moon on a given night dramatically impacts your starry photos, so checking the moon's phases and events is vital. With its detailed charts, interactive maps, and easy-to-understand explanations of important astronomical concepts such as lunar eclipses and solstices, Time and Date's Moon page provides helpful info so you can capture stunning photos of the night sky successfully.
5. International Dark-Sky Association
The International Dark-Sky Association (IDSA) is an organization that protects the night sky from light pollution. To this end, they've developed a tool called the International Dark Sky Places Finder which helps a night sky photographer scout out dark sky regions for their photography outings. This powerful tool provides detailed maps of light pollution levels around the world, allowing users to find and plan shoots in locations free from interference. Whether you're a beginner or an experienced astrophotographer looking for new places to capture fantastic images of the stars and galaxies above us, the International Dark Sky Places Finder will help you find the perfect spot!
⇢ Website
6. The Photographer's Ephemeris
The Photographer's Ephemeris (TPE) is a must-have tool for any nature photographer (whether shooting at night or in full daylight!) It provides detailed information about the sun, moon, Milky Way, and other astronomical events such as lunar eclipses and solstices. With its fantastic 3D maps, augmented reality tools, and calculators for sun, moon, and Milky Way paths, TPE helps you plan outings with accuracy and precision to make the perfect night sky image.

Photo: Matipon/Shutterstock
Remember, it's not just the sky that can be the star of the shot. The landscape underneath is also a character. Use foreground elements to build a storytelling composition. This rock at The Racetrack in Death Valley, the trail it left, and the cracked earth tell a story about the ebb and flow of water levels in this unique environment.
How to prepare for a night sky photo shoot
From weather conditions to upcoming celestial events, there are several considerations when preparing to make night sky images.
Photographing the night sky takes planning. First and foremost, watching weather conditions goes a long way toward ensuring you get the best shots possible. From cloud cover reducing the visibility of stars and other celestial objects to windy conditions increasing light pollution to cold temperatures causing “dewing” on lenses and other equipment, weather affects night sky photography in many ways. Plan for a night when the weather forecast indicates clear skies and low wind.
Not only does the weather matter but so does moonlight. Knowing what time the moon rises and sets is essential for capturing incredible photos of celestial events illuminated by the moonlight.
Check moonrise and moonset times in advance to time your photography accordingly.
Speaking of celestial events – and the sky in general – familiarize yourself with the varying objects and phenomena you'll be capturing, such as stars, planets, galaxies, nebulae, phases of the moon, and constellations and star clusters.
Research upcoming events like meteor showers, eclipses, or comets to ensure you don't miss out on a rare photography opportunity.
You can find a list of celestial events in your location by using a planetarium app such as Sky Guide.
A note on cold weather:
If you're willing to brave the cold, winter can be a great time for photographing the night sky, as the nights tend to be clearer due to the lack of moisture in the air. You'll need to keep a few things in mind, though.
Cold temperatures can have a damaging effect on camera equipment; batteries drain faster, and components such as shutter blades and lenses can become brittle.
Additionally, condensation can occur when moving a camera from cold to warm environments, potentially damaging the camera's internals. As such, keeping equipment insulated in cases or covers is important.
,")
Photo: Jaymi Heimbuch
Take advantage of things you can't control, like cars going by. This location is near a curve in the road, and there was traffic even in the middle of the night. After a few “ruined” shots when cars came by during an exposure, I decided to figure out the timing of exactly when to release the shutter so that an oncoming car would “light paint” the scene for just the right amount of time. Instead of frustration at traffic, it became a game of strategy and timing!
What camera settings to use
White Balance
For night sky photography, use the “daylight” or “auto” setting to ensure that the stars, moon, and other elements remain true in color. Many digital camera systems have specialized white balance settings specifically for night photography, so take advantage of these if available. (Note: white balance will adjust when photographing the Milky Way.)
ISO
ISO affects the amount of digital noise in your photos. Depending on how dark of a sky you're shooting, an ISO setting of between 1600-3200 is best for low-light photography.
If the ISO setting is too low, your photo will be underexposed and too dark. If the ISO is too high, the image could come out noisy (though excellent noise reduction software is available to improve noisy images in a snap during post-processing).
Experiment with different settings to see your camera's capabilities, and adjust until you find what works best for you.
Aperture
Aperture affects the amount of light that reaches your camera's sensor. When shooting night sky photography, it is important to set your aperture as wide as possible (around f/2-f/4) to maximize light-gathering capabilities and get the highest quality image results.
However, this can also result in loss of sharpness, causing stars to appear as streaks rather than points of light, so experiment with different settings to find the ideal balance for your photos.

Photo: John A Davis/Shutterstock
Shutter speed is possibly the most important choice you'll make. How long you keep the shutter open affects if you have pin-point-perfect stars, or star trails – and how long or short those trails are. The joy of this niche is how much creative experimenting you get to do in a single evening!
Shutter Speed
Shutter speed determines the exposure time for your shot, which affects the amount of stars' motion (or rather, reveals the amount of the earth's rotation) captured in your photos. Adjust this setting based on the brightness of the sky, atmospheric conditions, and the level of detail you want in your shot.
A longer shutter speed – upward of 60 seconds – is best for capturing star trails but may introduce blur. A shorter shutter speed will freeze the stars where they are in crisp detail, perfect for Milky Way photos.
We recommend getting started at 15-30 seconds and adjusting as you go to find the balance that works best for you and your camera.
File Format
File format affects the quality and size of your photos. Shoot in RAW format (instead of JPEG) to capture the maximum amount of data and detail. You'll ultimately produce higher-quality images, and working with the image is easier during post-processing, thanks to all that information in the file.
Remember that these formats result in larger file sizes, so ensure you have enough storage space on your device and extra memory cards on hand.
Focusing
To make sure that the stars are as sharp as possible, use manual focus and infinity focus, adjusting the lens focus ring until the stars appear crisp.
Consider using autofocus for objects closer to the camera.
If your camera has a focusing system designed explicitly for night sky photography, try it out!
Image Stabilization
When shooting night sky photography, use a sturdy tripod or some form of image stabilization to ensure sharp images. If you're using a tripod, you can turn off image stabilization features.
Keeping image stabilization on during long exposures can actually create blur as the camera's motor causes movement. However, if you're not using a tripod, turn on image stabilization when shooting at longer exposures to minimize camera shake and maximize the sharpness of your final image.
You can also try using continuous shooting mode to capture several images in a row, upping your odds of a sharp keeper.

Photo: Jaymi Heimbuch
Silhouettes can be a powerful part of a night sky photo composition. Play around with placing points of interest in the sky next to, above, or under elements on the ground for added interest.
7 tips & techniques for better shots
So, once you're familiar with camera settings and ready to adapt to adjust your equipment accordingly, take the leap and head outside.
Here are a few tips to get you started:
1. Take test shots
Taking test shots is a great way to learn the craft and become familiar with the settings on your camera. Start by putting your camera in manual mode and choosing different ISO, aperture, and shutter speed setting combinations to see the effects.
Don't take things too seriously at this point. Play with taking a test shot of the sky at different exposures and shutter speeds, tracking celestial objects such as stars or planets across the night sky.
Review each practice shot on your camera's LCD screen to assess what settings worked best for that scene – make adjustments and keep experimenting.
2. Incorporate foreground elements
Capture unexpected patterns by incorporating foreground elements such as rocks, trees, and buildings into the frame. This can add depth, texture, and interest to your photos. Try using those elements as focal points in your frame, taking different test shots at different focal lengths and shutter speeds to see what works best.
3. Experiment with angles and perspectives
Experimenting with different angles and perspectives helps convey the vastness of space through night sky photography. Try getting down low to include the foreground landscape or to create dramatic silhouettes against the starry sky.
Move around to allow you to shoot from multiple locations to reveal different compositions throughout the night.

Photo: Francesco Ferrarini/Shutterstock
Star trails are an exciting way to add a sense of passing time or a feeling of other-worldliness to a scene. You can create circular star trails by aiming toward the poles or straighter star trails by aiming toward the east or west. It's worth learning a bit of astronomy so you can make purposeful decisions about compositions and how to strategize for them.
4. Underexpose to capture star trails
Producing photos of star trails is a great way to capture the dynamic night sky. Create a star trail image by intentionally underexposing and using a long shutter speed – usually 1-15 minutes, depending on how short or long you want the trails. This creates a sense of motion and highlights the contrast between the dark night sky and the bright stars.
5. Use longer exposure for meteors
Capturing photos of meteors passing through is one of the most exciting aspects of night sky photography. Capture the path of meteors by using long exposure times, typically 30 minutes or longer. With patience, practice, and a little luck, you'll capture stunning photos of meteors.
6. Try out focus stacking
Focus stacking combines multiple photos with varying focus points and exposure levels into a single final image, ultimately creating a greater depth of field than possible with the camera's more shallow depth of field. Combining photos digitally during post-processing with software such as Adobe Photoshop can bring out more detail in shadows and highlights, reduce noise, and increase overall sharpness.
7. Play with light painting
Using a light source such as a flashlight, lantern, or headlamp to paint dramatic streaks of light across the sky or to illuminate foreground elements while still exposing stars in the background can add drama and depth to night sky photography. When using this technique, keep in mind how the darkness will affect visibility – longer exposure times may be necessary to capture the details of light painting elements fully.
Photos: Jaymi Heimbuch
A little bit of light goes a long way in turning a silhouette into a subtly lit character. Play with adding a touch of light from a headlamp, an LED panel, or an adjustable flashlight with a color filter over it. It takes a few tries to figure out how much light to use and where, but your composition will benefit from the experiment.
How to find night sky photography locations
One of the most essential factors in deciding where to photograph the night sky is finding a location with minimal light pollution. In general, the further away you are from city lights, the better. However, even some rural areas can have ambient light from streetlights and house lights.
Once you've found a location that looks promising, it's always a good idea to visit in person to ensure there aren't any unexpected sources of light or unwanted visual obstructions.
Use the websites and apps we mentioned above to start scanning for locations, or even better, check out our 10 favorites in our guide, 10 Best Locations in the US for Astrophotography and Night Sky Photography

Photo: Jun Su/Shutterstock
Night sky photography will take you to extraordinary places. The search for skies dark enough for star trails or capturing the Milky Way plus intriguing characters and features in the landscape, makes this niche extra exciting. Imagine meeting this ancient bristlecone pine and contemplating all the thousands of starry nights its witnessed…
Dark sky conservation and how you can help protect star-filled skies
Dark sky conservation is a movement to protect the night sky from light pollution.
Light pollution is any artificial, human-caused illumination that negatively impacts wildlife and ecosystems, disrupts astronomical research, and diminishes the viewing experience of natural starlight for people around the world. And, of course, excess light disrupts your ability to capture stunning night skies.
To address these problems, the movement advocates for responsible outdoor lighting practices and more efficient lighting systems.
Smarter lighting practices ensure that people can appreciate the natural starscape without interference from excessive artificial light, and helps preserve nearby ecosystems by preventing light from disrupting the nocturnal behavior of animals and plants.
Importantly, dark sky conservation improves public health. Excessive artificial light can cause eyestrain, disrupt sleep cycles, increase anxiety levels, and create other problems related to living in brightly lit environments over long periods.
By limiting unnecessary illumination at night, dark sky initiatives actually promote better sleep patterns and improved mental well-being for people everywhere.

Photo: EpicStockMedia/Shutterstock
It's often tough to get far enough away from city lights that you no longer see an orange glow at the horizon of your night sky shots. But beyond affecting your shots, the glow from city lights has an extraordinarily negative impact on people and wildlife alike.
Many local governments have already enacted laws that limit outdoor lighting intensity and require more efficient lighting systems, but more action is needed.
You can contact your local governing body and ask them to take steps towards improving their night sky preservation efforts, such as banning certain types of lights or implementing even stricter regulations on outdoor lighting.
In addition, you can support environmental organizations actively campaigning for dark sky conservation, such as the International Dark-Sky Association (IDA).
The IDA works with individuals, communities, businesses, and governments worldwide to preserve dark skies for future generations. By donating or volunteering with these organizations, you help spread awareness about dark sky conservation and encourage others to take action.
You can also do things at home to help reduce light pollution. One of the most straightforward actions is switching out traditional incandescent bulbs with LED bulbs that produce much less glare. Additionally, you can install motion-detecting lights outdoors so they only turn on when necessary – this helps conserve energy while keeping nighttime darkness undisturbed.
By following these simple steps and taking part in larger initiatives for dark sky conservation, we can all work together toward protecting our night skies for future generations!

Photo: Benjamin Schaefer/Shutterstock
Planes, satellites, meteors, and other moving objects add intrigue to a photo. A sky that looks calm to our naked eye is revealed as a very busy place over the course of a few seconds or minutes.
Final Thoughts
Whether shooting from light-polluted suburbs or dark skies in remote locations, night sky photography continues to draw us in with its unique brand of mysterious beauty. A rewarding challenge for all levels of photographers, anyone can capture stunning night sky shots and celestial wonders with the right equipment, knowledge of shooting techniques, and creative editing tools.
By applying the tips discussed in this guide, you'll be well on your way to planning the perfect night sky photography trip and taking your photos to the next level.

")