Read Time: 14 minutes
Ever tried capturing the lightning-fast antics of hummingbirds? It’s tough, right?!
This comprehensive guide to hummingbird photography navigates you through the intricacies of capturing these vibrant birds with practical tips on behavior, the right camera gear, and ideal camera settings so you can maximize your odds of getting great shots of these little jewels.

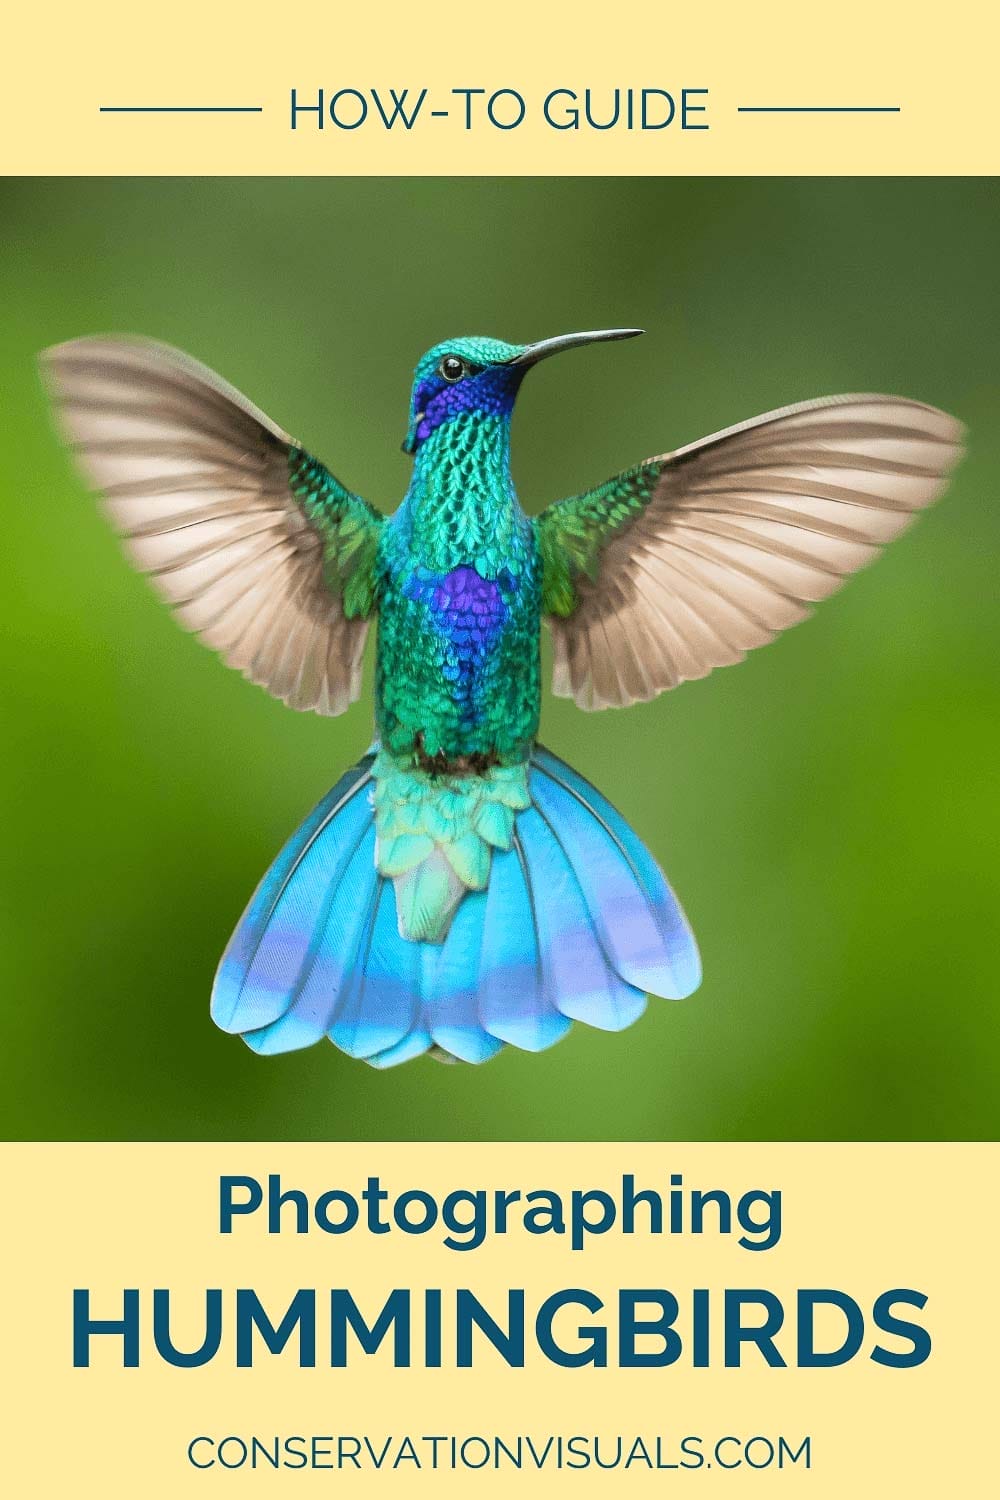
Photo: Ondrej Prosicky/Shutterstock
When possible, position yourself with the sun behind you to enhance the colors and details of the hummingbird’s plumage.
Understanding Hummingbird Behavior for Better Shots
Photographing hummingbirds is more than just pointing and shooting. It’s about diving deep into their world, understanding their habits, and using that knowledge to predict their movements.
Hummingbirds are creatures of habit. Observing these habits closely can predict where they’ll buzz next, offering you golden opportunities for amazing shots.
Their love for specific flowers and water features isn’t just beautiful—it’s your chance to anticipate where they’ll be and get ready for the perfect shot.
Recognizing Hummingbird Sounds
The secret to being ready before a hummingbird appears in your frame is to tune in to their unique sounds. Recognizing these sounds can alert you to the presence of the birds even before they are seen.
Listen for the telltale humming sound that hummingbirds make, which is produced by their rapidly moving wings.
Additionally, pay attention to the soft chirps and twittering noises they emit, especially during courtship or when they feel threatened.
The ability to identify hummingbird sounds isn’t just about alertness—it’s also about tracking.
These birds are agile, and their rapid movements can make it challenging to follow them visually.
But by becoming familiar with their sounds, you can understand their moods and intentions better, and track their movements more accurately, which is a core skill not just for great hummingbird photos but in wildlife photography as a whole.
So, the next time you’re out photographing hummingbirds, let your ears guide you to the perfect shot!
Learning Feeding Patterns
The key to successful bird photography lies not just in understanding bird sounds but also in interpreting their feeding patterns.
Hummingbirds typically appear at feeding spots at least once an hour, following a fairly regular timetable. No wonder bird photographers always emphasize patience!
By understanding their feeding patterns, you can predict when these birds are most likely to visit feeders or flowers.
This predictive knowledge can dramatically improve your chances of getting the best shots.
So, while patience is your best friend, knowledge about their feeding patterns is your secret weapon in photographing hummingbirds!

Photo: sljones/Shutterstock

Photo: pr2is/Shutterstock
Plant native flowers in your garden to attract hummingbirds naturally for more candid shots. They also LOVE clean water features.
Crafting the Ideal Hummingbird Haven
Now that we’ve understood the behavior of hummingbirds, let’s shift our focus to the setting. If you’re able to photograph hummingbirds from your own backyard then you have extra opportunities, since you could turn your garden into an oasis for them.
An ideal hummingbird haven isn’t just about making your backyard appealing to the birds—it’s also about setting up the perfect stage for your hummingbird photography!
Creating an ideal hummingbird haven is about attracting these birds to specific locations for photography.
This involves the strategic placement of feeders and the planting of a diverse selection of flowers that not only create natural and beautiful backgrounds but also attract hummingbirds.
The key is to ensure a steady availability of nectar throughout the year by planting a variety of plants that bloom sequentially.
Also, having large trees within the hummingbird habitat can serve multiple purposes, including as perches, arenas for courtship displays, and nesting sites.
Choosing the Right Flowers
When it comes to attracting hummingbirds, not all flowers are created equal. Red, orange, and pink tubular flowers are particularly appealing to hummingbirds because of their high nectar content and ease of access.
Non-tubular red flowers like roses and geraniums may look attractive but are often overlooked by hummingbirds due to their lack of nectar.
Selecting Native Flowers for Hummingbirds
When creating a haven for hummingbirds, choosing native flowers is a smart move. Native blooms not only thrive in their local environment but also cater perfectly to the needs of local hummingbird species.
These flowers have co-evolved with hummingbirds, resulting in shapes and colors that are ideal for the birds’ feeding habits.
By planting a variety of native flowers that bloom at different times, you ensure a year-round buffet for these agile fliers.
Plus, native plants often require less maintenance, making them a sustainable choice for both your garden and the hummingbirds you aim to attract.
By incorporating these hummingbird-attracting flowers into your photography setup, you can create a focused photographic environment.

Photo: Kathy Clark/Shutterstock
Clean your feeders regularly and keep them filled with fresh nectar to attract and keep hummingbirds coming back.
The Art of Feeder Placement
Choosing the right flowers is just one part of the equation. The placement of hummingbird feeders plays a significant role in attracting these birds and creating optimal photographic opportunities.
Positioning the hummingbird feeder in a well-lit area with the sun behind the photographer can maximize color rendition in the images.
But it’s not just about light. Placing feeders close to walls or obstructions can encourage hummingbirds to perch facing the desired direction, making it easier to capture them in photographs.
Also, setting up multiple feeders spaced apart can help tone down the hummingbirds’ feisty territorial instincts, leading both to better photographic opportunities and a more chill living situation for the hummingbirds.

Photo: Fiona M. Donnelly/Shutterstock
Capture interaction between two hummingbirds by increasing your aperture to f/8 or higher for greater depth of field.
Gear Up: Selecting the Best Equipment for Hummingbird Photography
Now, lets gear up and get ready to capture those stunning hummingbird photos and don’t forget to photograph hummingbirds in all their glory!
Camera Body and Lens Requirements
Camera Body
When choosing a camera body, prioritize those with strong autofocus performance and high continuous shooting speeds. Mirrorless cameras and high-end DSLRs are excellent choices. Look for models that offer:
- Fast Autofocus Systems: Cameras with advanced phase-detection autofocus systems can lock onto hummingbirds quickly and accurately.
- High Frame Rates: A camera that can shoot at least 10 frames per second (fps) will help you capture the split-second movements of hummingbirds.
- Good Low-Light Performance: Hummingbirds are active during dawn and dusk when lighting conditions can be challenging. A camera with good high-ISO performance will ensure you get sharp images with minimal noise.
Lenses
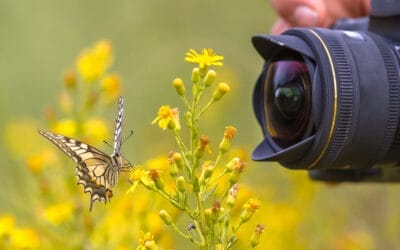
Your lens choice is just as important as the camera body. A telephoto lens will allow you to capture close-up details without disturbing the birds. Here are some recommendations:
- 300mm Lens: A 300mm lens is generally long enough for close-up images while maintaining a respectful distance. For more versatility, consider a zoom lens like a 100-400mm, which allows you to adjust your framing without moving.
- Macro Lenses: If you want to capture extreme close-ups, a macro lens can be a good addition to your kit. They can reveal intricate details of the hummingbird’s feathers and features.
Additional Gear
- Tripod or Monopod: Stability is key when photographing hummingbirds. A sturdy tripod or a monopod will help you keep your camera steady, especially when using long lenses.
- Remote Shutter Release: This allows you to trigger the camera without physically touching it, reducing the risk of camera shake.
- Flash with Diffuser: Hummingbirds often move in and out of shadows. A flash with a diffuser can help you fill in shadows and bring out details without creating harsh light spots.

Photo: Anna Medwenitsch/Shutterstock

Photo: fluffandshutter/Shutterstock
Look for perching opportunities where hummingbirds might rest, providing a moment to capture them in stillness.
Perfecting Camera Settings for Crisp Hummingbird Photos
Natural Light Photography Settings
Shutter Speed
Using fast shutter speeds is a given with hummingbirds. This is true even if you like the more dreamy look of blurred wings, which is a nice artistic choice. If that’s the case, a slower shutter speed, such as 1/500 or higher, could work to get a sharp shot of a hummingbird’s body with the wings in blurred motion.
But, to freeze the fast wing beats of a hummingbird, you’ll need a fast shutter speed of at least 1/2000th of a second, though faster is ideal. Cranking up your shutter speed is key to capture sharp images without motion blur.
Aperture
A lens aperture around f/5.6 to f/8 helps keep the hummingbird in focus while softly blurring the background. This aperture range provides a good depth of field, ensuring that the bird remains sharp.
ISO Settings
Start with an ISO of 800 and adjust according to the lighting conditions. If it’s a bright day, you might lower it to 400 or 200 to reduce noise. On cloudy days or in shady areas, you might need to increase it to ISO 1600 or higher, being cautious of noise levels.
Focus Mode
Continuous Autofocus (AF-C or AI Servo) allows the camera to continually adjust focus on the moving bird, essential for keeping it sharp as it darts around.
Drive Mode
Continuous Shooting (Burst Mode) mode allows you to take several photos in rapid succession, increasing your chances of capturing the perfect moment.

Photo: Henk Bogaard/Shutterstock

Photo: Henk Bogaard/Shutterstock
Study the hummingbirds’ flight patterns to anticipate their movements and position yourself accordingly for the best angles.
Flash Photography Settings
Using a flash can fill in shadows, freeze motion in lower light, and bring out the vibrant colors of a hummingbird’s plumage. Here’s how to adjust settings for flash photography:
Shutter Speed:
Set your shutter speed to the maximum sync speed of your camera, typically between 1/200th and 1/250th of a second. This is necessary to synchronize the flash burst with the shutter.
Aperture:
An aperture of f/8 or higher is often used. This not only increases the depth of field but also compensates for the intense burst of light from the flash, preventing overexposure.
ISO:
With the additional light from the flash, you can often use a lower ISO to keep image quality high and noise low. ISO 400 to 800 can be effective, depending on the power of your flash and ambient light conditions.
Flash Power:
Use the manual settings for your flashes so you can dial in the perfect amount of light. Start with a lower flash power (1/16 or 1/8) and adjust based on the effect and the distance from the subject. This helps in not overwhelming the scene with light while freezing the hummingbird’s rapid movements.
Flash Diffusion:
Using a diffuser or bouncing the flash off a nearby surface can help soften the light, making it appear more natural and less harsh on the hummingbird’s feathers.
Additional Flash Units:
If possible, use multiple flashes strategically placed to ensure even lighting and to eliminate shadows. Each flash should be set to a lower power to balance the exposure and reduce harshness.
Flash Photography Tips
While natural light is great, flash photography plays a big role in capturing sharp images of hummingbirds, especially in freezing the blur of hummingbird wings. Using at least two flash units allows for the softening of deep shadows and sharper images. But remember, flash can be harsh. That’s why it’s recommended to use softboxes or diffusers to reduce the harshness of flash on hummingbirds.
But there’s more to flash photography than just reducing harshness. Here are some additional tips:
- Reduced power settings for flash, such as 1/8 or 1/16, allow for extremely high-speed captures equivalent to 1/9000 or 1/15000 second, while maintaining a shutter speed at or below the camera’s max flash sync speed.
- If you want to bring out the shimmering iridescence of a hummingbird’s plumage, position an off-camera flash at a slight upward angle.
- Extend the flash to fill shadows and add a catchlight to the bird’s eye.
These techniques can help you capture stunning flash photos with high-speed flash photography.

Photo: Kevin Pickell/Shutterstock
Focus on the beak or head to ensure your main subject is sharp, even if the wings are blurred.
Ethical Considerations When Using Flash on Hummingbirds
While flash photography can certainly capture the dazzling beauty of hummingbirds, highlighting their iridescent feathers and freezing their rapid wing beats, we must tread carefully to respect their well-being.
The health and comfort of wildlife always take precedence over photos.
When employing flash, keep a close watch for any signs that it might be bothering the hummingbirds.
Changes in their behavior, like decreased activity or avoiding the area after a flash, are telltale signs of distress. If you observe these reactions, discontinue the use of flash right away.
To reduce the risk of stress, always use the lowest necessary flash power and soften the light with diffusers. Positioning the flash at an indirect angle can also help prevent startling these delicate creatures.
Also, consider using longer lenses to maintain a respectful distance and avoid flash photography in dim conditions when their eyes are most sensitive.
This way, we can enjoy capturing their beauty without compromising their natural behavior and safety.

Photo: Ondrej Prosicky/Shutterstock
A flash with a diffuser can help fill in shadows and bring out details in the feathers without creating harsh light spots.
Utilizing Manual Mode for Creative Control
For advanced control over the final image, utilizing manual mode can be beneficial.
One advantage of manual mode is the ability to open the camera’s aperture all the way and focus manually to precisely capture details in hummingbird photography.
But manual mode isn’t just about focus and aperture.
Using Auto ISO with manual settings can help manage exposure while maintaining creative control.
So, don’t be afraid to switch to manual mode. It’s your chance to take full control and unleash your creativity!
Pre-Focus Strategies
Bird photography often involves anticipating birds’ actions and pre-focusing the camera on areas where they are likely to land.
Pre-focusing where you expect action, like a popular feeder or a frequently visited flower, can set you up for success.
That way, when a hummingbird zips into the frame, you’re ready to capture its magic.
Capturing the Action
Capturing the action involves more than just pressing the shutter button. To increase the odds of capturing the rapid movements of hummingbirds, you should use a continuous high-speed drive mode, allowing you to take a rapid succession of photos during brief opportunities.
When hummingbirds appear, the best approach is to immediately begin shooting in the highest burst mode your camera allows to capture as much action as possible.
Employing continuous focus mode along with back button focus can assist in keeping the rapidly moving hummingbirds in sharp focus throughout the shooting session.
So, be ready to capture the action and make every second count!

Photo: Fernando Calmon/Shutterstock
Position feeders, perches or flowers against uncluttered backgrounds to keep the focus on the hummingbird.
Post-Processing Techniques to Enhance Hummingbird Images
Post-processing is where you can truly transform your hummingbird photos. To enhance shadows in hummingbird photos, post-processing applications allow for exposure adjustments that can recover details in shadowed areas.
Photographers use applications like Adobe Lightroom for post-processing, which supports RAW format adjustments for extensive detail recovery.
When adjusting exposure in post-processing, it’s important to recover as much detail as possible without compromising the highlights of the image.
Mastering these post-processing techniques is key to enhancing the overall quality of hummingbird images, from brightening shadows to sharpening details and saturating colors.
Editing for Clarity and Color
Editing for clarity and color can bring out the true beauty of your hummingbird photos.
Post-processing is a big part of enhancing the natural iridescence of hummingbird feathers which may not be fully captured in-camera.
Using tools such as adjustment brushes to enhance local saturation or selectively increasing vibrancy can bring out the bird’s feather colors more vividly without affecting the entire image.
Adjusting vibrancy in post-processing fills in colors in less saturated areas of a RAW image, aiding in the recovery of vibrant colors possibly lost during initial capture. So, don’t shy away from editing. It’s your chance to refine, enhance, and truly make your hummingbird photos shine!
Cropping for Composition
Hummingbirds are small, and your shots might show them quite small in the frame. So, it’s tempting to crop heavily so all the focus is on your starring subject. But, excessive cropping may result in loss of detail and pixelation.
So, crop with care.
When cropping, there should be enough space around the bird to ensure it doesn’t appear constrained or compressed, providing visual space for the dynamic aspect of flight. So, as you crop your images, remember to keep the hummingbird in focus while maintaining a visually appealing composition.

Photo: Martin Pelanek/Shutterstock
Use manual focus to pre-focus on a flower, perch or feeder, then wait for the hummingbird to enter your frame.
7 Top Tips for Ethical Hummingbird Photography
Capturing the fleeting beauty of hummingbirds is a joy and a privilege, and it comes with the responsibility to keep our feathered subjects safe and stress-free. Here are some top tips to ensure your hummingbird photography is as ethical as it is exhilarating:
-
Keep Your Distance: Employ telephoto lenses to capture detailed shots without getting too close. This helps minimize stress for the birds and keeps their natural behavior undisturbed.
-
Use Feeders Wisely: While feeders are great for attracting hummingbirds, place them thoughtfully— away from busy areas, clear of windows to reduce the risk of collisions, and at a position where the visiting birds can easily escape from potential predators. Remember to change the sugar water frequently and clean the feeders regularly to prevent diseases.
-
Prefer Natural Light: Natural lighting is your best friend when photographing hummingbirds. If you must use flash, ensure it’s set to the lowest intensity, use diffusers to soften the light, and never direct it straight at the birds, especially in dim conditions.
-
Capture Natural Behavior: Focus on photographing hummingbirds as they engage in natural activities like feeding from flowers or preening. Avoid staging scenes or using unnatural methods to attract birds into specific poses or behaviors.
-
Be Mindful with Feed Placement: Position feeders and any other props in a way that doesn’t alter the hummingbirds’ natural path or behavior. Ensure any setup for photography blends into their environment without causing disruption.
-
Educate and Share: Spread the word about ethical photography practices. Sharing your knowledge and approach with fellow photographers can help foster a community committed to conservation and respectful bird photography.
-
Review and Reflect: After your photography sessions, take time to review not only your photos but also your approach. Reflect on how your presence affected the birds and think about adjustments you could make next time to reduce your impact even further.
Final Thoughts
Creating photos of hummingbirds you’re excited to show off to others means getting to know their quirky behaviors, setting up a welcoming spot for them in your garden, picking out just the right gear, and nailing those camera settings.
You’ve also got to have a bit of patience and great timing.
Follow these tips and pretty soon, your backyard will be more than just a garden—it’ll be a top-notch hummingbird photo hub!

Photo: Ondrej Prosicky/Shutterstock
Reduce your presence by using a telephoto lens, allowing you to photograph hummingbirds without disturbing them.

Photo: Jennifer Bosvert/Shutterstock
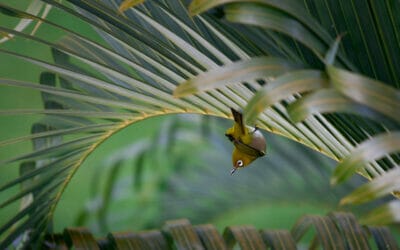
Frame your shots with natural elements like leaves and flowers to create a more engaging and context-rich image.

Photo: Richard Seeley/Shutterstock
Use the camera’s burst mode to take a series of photos in quick succession, increasing your chances of capturing the perfect moment.